Bootstrap Checkbox Label
Intro
In some cases the elementary details might become extremely essential-- most especially when you get to need them. As an example exactly how do your site visitors connect with the pages you build stating a basic Boolean action-- just yes or no regarding some of the thoughts you need to request, exactly how they do agree to the terms and conditions or maybe line up a handful of the attainable options they might possess. We usually surpass this without paying very much of an attention to the feature chargeable for these types of activities but the Bootstrap Checkbox Position is really a quite critical feature-- one our forms just can't really complete without.
Located in newest fourth edition of the Bootstrap framework we are supplied with the
.form-check.form-check-label<div>.form-check.form-check-label<label><input>.form-check-inputEfficient ways to apply the Bootstrap checkbox:
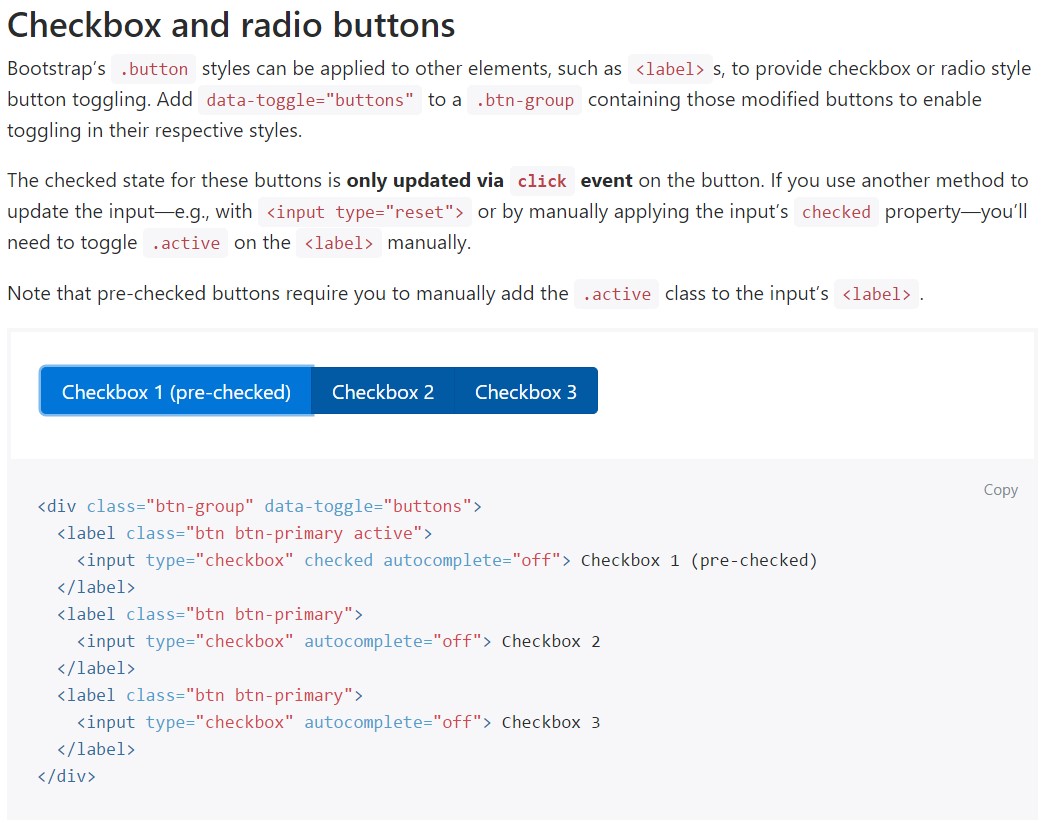
Bootstrap's
.button<label>data-toggle=" buttons".btn-group
<div class="btn-group" data-toggle="buttons">
  <label class="btn btn-primary active">
    <input type="checkbox" checked autocomplete="off"> Checkbox 1 (pre-checked)
  </label>
  <label class="btn btn-primary">
    <input type="checkbox" autocomplete="off"> Checkbox 2
  </label>
  <label class="btn btn-primary">
    <input type="checkbox" autocomplete="off"> Checkbox 3
  </label>
</div>
In certain cases we really need the checkboxes to be in our forms without the customer really being capable to have any kind of activity clicking on them-- that's where exactly the disabled option appears in.
In order to disable effectively a checkbox in Bootstrap 4 applying the basic HTML attribute
disabledIn case you appreciate the idea and indeed wish to accomplish this you have to assign the
.disabled.form-checkOne more example
If applying checkboxes, wrap all of them in a
<label>.custom-control.custom-checkboxUtilize
.custom-control-input<input>As well employ two
<span>.custom-control-indicator.custom-control-description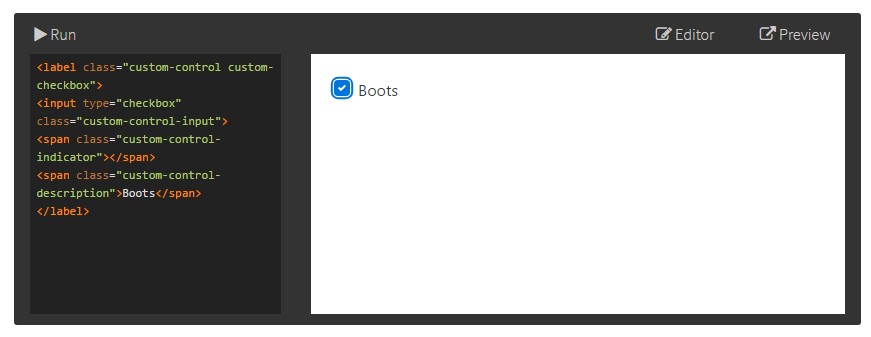
<label class="custom-control custom-checkbox">
<input type="checkbox" class="custom-control-input">
<span class="custom-control-indicator"></span>
<span class="custom-control-description">Boots</span>
</label>
Bootstrap Checkbox Position forms
Default radios and checkboxes are greatly enhanced upon with the aid of
.form-checkThe disabled class will at the same time light up the message colour to help reveal the input's state.
A brand-new thing for the Bootstrap version 4 framework is the arrival of the so called custom made form features. These are actually the very same components we are used to in usefulness however styled way more attractive and with the Bootstrap method. Having them you can put in certain spice as well as individuality to your information through simply delegating a number of supplemental classes to the commands you provide in your forms.
For you to apply custom-made checkboxes wrap them within a
<label>.custom-control.custom-checkbox<input>.custom-control-input<span>.custom-control-indicator.custom-control-descriptionConclusions
That's literally everything you require to complete in order to set a checkbox feature within your Bootstrap 4 powered website page and bring in certain custom flavor to it bring in it a quality looks. Currently all you need to do is repeat the drill until you've examined all of the checkboxes wanted are already on the web page.
Check out a number of video clip information regarding Bootstrap checkbox
Linked topics:
Bootstrap checkbox main information
Centering checkbox buttons in Bootstrap 4 row

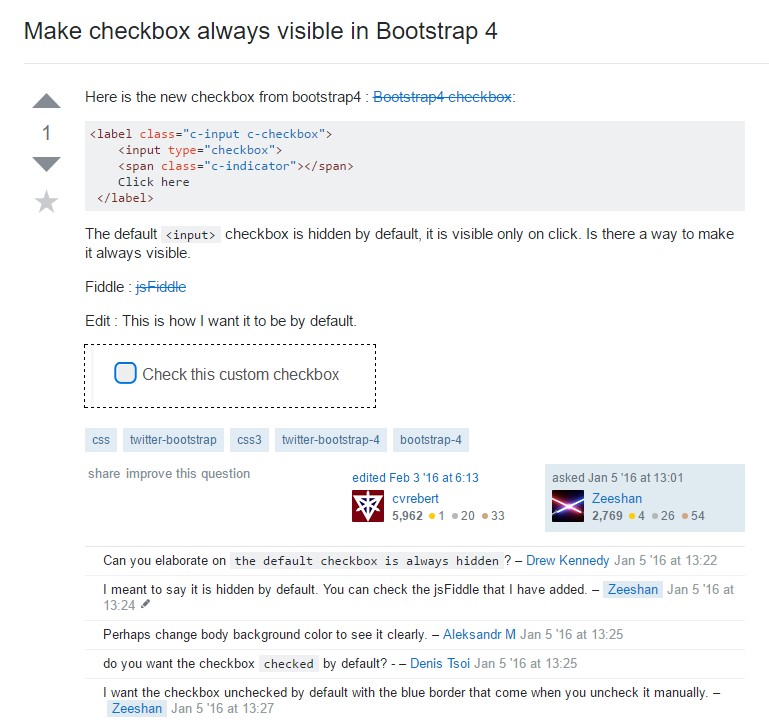
Make checkbox always visible in Bootstrap 4